How to Paint your Bike and Make it Look New Again
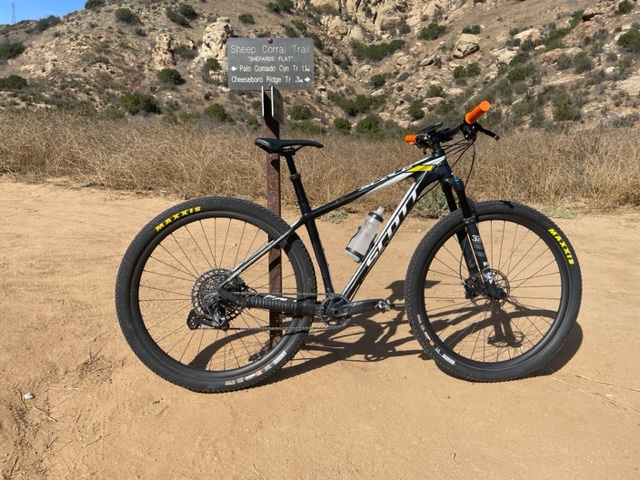
One of my favorite bikes is a 2012 Scott Scale, a really light carbon frame hardtail mountain bike. It’s super light, rides great, and I have upgraded the components over the years. There was nothing wrong with this bike, with one exception. It had the original paint job, and it was ugly from the scratches from my various adventures over the years, and the color/decal scheme was outdated.
So I decided to paint my bike to give it a new look for 2023. Below is a step-by-step guide on how to paint your bike and make it look new again.
Step One: Determine what design/color you want.
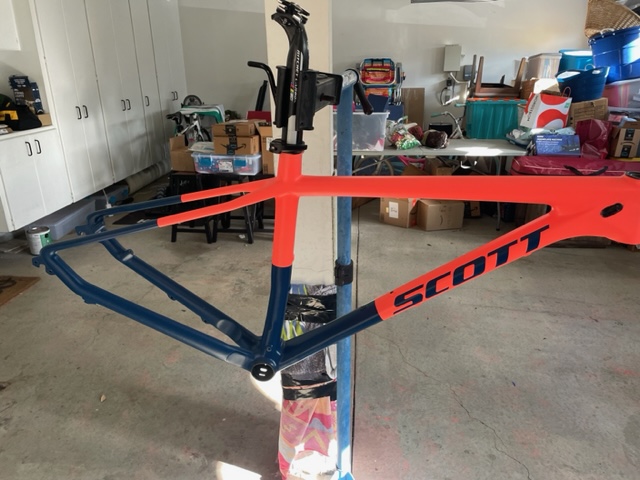
You can basically do whatever you want. Here are some great resources to get your creative juices flowing. I decided to use the colors of my team kit, Navy and neon orange.
Step Two: Order supplies.
After you figure out what you want to do with your paint design, It’s time to order supplies so you have what you need after you get your bike pulled apart.
Paint: I bought my paint from a company called Spray.Bike and am really happy. This is a company that specializes in providing bike paints for DIY applications. The paints are specially formulated for application to bike frames. Spray.bike products are available for purchase online or through select bike stores. Additionally, they have some great how-to videos that I found very helpful and I think you will too. Click here to visit Spray.Bike

Paint prep supplies: You’re going to need to buy the following if you don’t already have them.
A face covering. There are nasty chemicals in this type of paint. A face covering is mandatory.
Painters Masking Tape: Unless you’re painting everything the same color.
Sandpaper: As I have a carbon frame, I used fine wet sand sandpaper. Note; I did some extensive research on what grit sandpaper to use and found a bunch of conflicting information. I settled on 320 grit and it worked for my project.
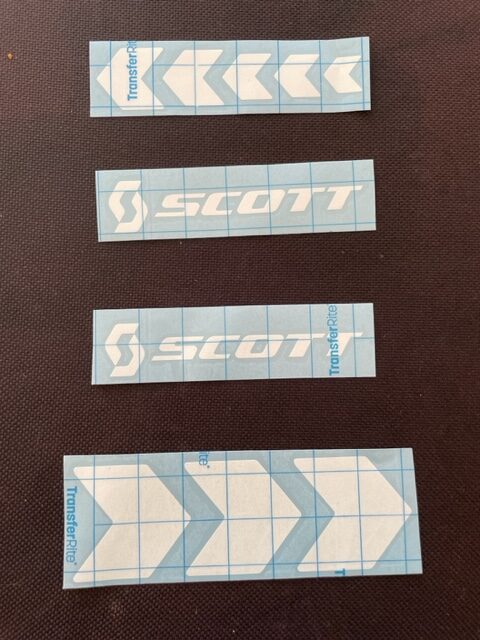
Decals: I found a great resource on Etsy called MohrDesignsDecals. This company has decals from virtually every bike manufacturer. They can even design custom decals for you at a reasonable price.
Filler: If your bike has miles on it, more than likely, you’re going to have some dents and other stuff you want to fill in. I used JB Weld and it worked great for me. It was super easy to use, and sanded down easily.
Step Three: Take your bike apart.
With a few tools, you can disassemble your bike fairly quickly. Note: Unless you’ve built several bikes, don’t throw anything away until you finish the rebuild. Also, make sure you take photos of your bike setup for reference when you’re putting it back together again. Better to be safe than sorry!
Also, If you don’t have one already, it’s time to purchase a bike stand. Not only will it make pulling your bike apart much easier, but you can also use it as a painting rig. Bottom line is if you do any work on your bike at all, you will use your bike stand all the time. I have a stand made by Park Tool I bought years ago and use it all the time.
Step Four: Prep your frame.
First, use soap and water and degreaser to thoroughly clean off all the grime and grease off your frame. After your frame is clean, use a blow drier to heat up and remove any stickers. From there, you’re ready to fill in the scratches with your filler.
After the filler sets, it’s time for you to sand the frame. The good news with carbon is that you don’t need to remove the old paint. All you need to do is a light sanding to smooth out the surface and get your frame ready for the base coat. Note: Make sure you don’t sand down to the carbon as you could damage/weaken your frame. You only want to sand the clear coat.
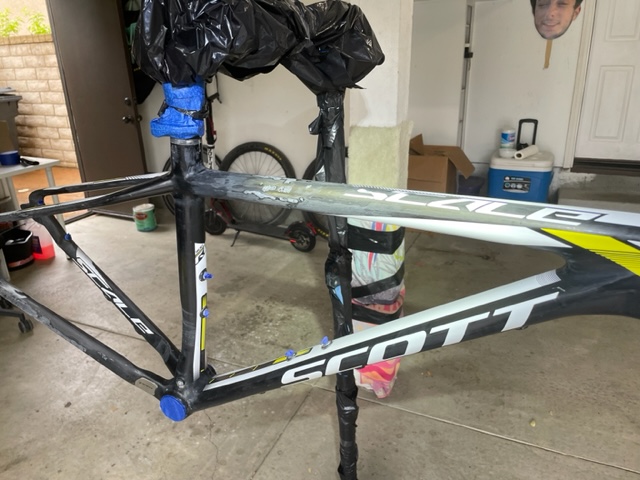
Wipe down your frame with a wet rag then tape all the areas you don’t want to get paint on.
Step Five: Apply your primer layer.
This is not a step you want to skip. Make sure you wear a painter’s mask and paint outside or in a very well-ventilated garage. The primer coat provides the adhesive for your paint. Make sure you allow your primer coat to dry properly before you apply the next coat.
Step Six: Apply your first coat of paint.
OK, it’s GO TIME! Make sure you follow instructions from the paint manufacturer to the letter! Note: If you’re using paint from Spray.bike the distance from the can to the bike frame is only 2 – 4 inches. This is much different than you’ll be used too. Practice on something to get the feel if you’re not comfortable.
Step Seven: Apply decals.
If you’re doing a multiple-color paint job, now is the time to mask off areas and apply decals. The trick here is to take your time. Remember the old saying, measure twice, cut once? Applying decals is pretty straightforward as long as you follow the manufacturers’ instructions.
Step Eight: Apply your next coat.
OK, more GO TIME!!! Take your time and follow the paint manufacturer’s instructions to the letter.
Step Nine: Remove the decals.
Before your second coat dries, carefully pull the decals off and any tape you applied to your frame.
Step Ten: Apply the clear coat.
This is your final coat. Here you have the choice between a gloss or flat finish. I opted for the flat finish for this bike.
Step 11: Wait for the paint to cure.
Curing time varies, so check the instructions on the can. I needed to wait seven days for my paint to cure. This doesn’t mean you need to wait for days waiting for the paint to dry; this gives you time to plan your rebuild.
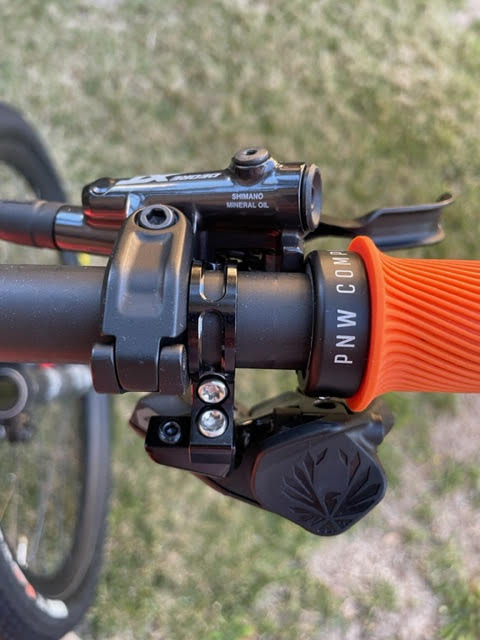
You want to replace your cables and housings, for sure. Also, you want to clean and inspect all the parts you pulled off your bike and replace them if necessary. Additionally, this is a good time to consider upgrading parts. I decided to replace my old Avid brakes with Shimano XT and upgraded my Sram GX 1X12 to the latest AXS technology. I am super happy about both!!
Step 12: Rebuild your bike.
The rebuild can be the most daunting step, so take your time and don’t be afraid to take your repainted frame and parts to your local bike shop and have them do the rebuild for you. If this is your first bike build, YouTube is an amazing tool to help you when you get stuck. ANd trust me, you’re going to get stuck!
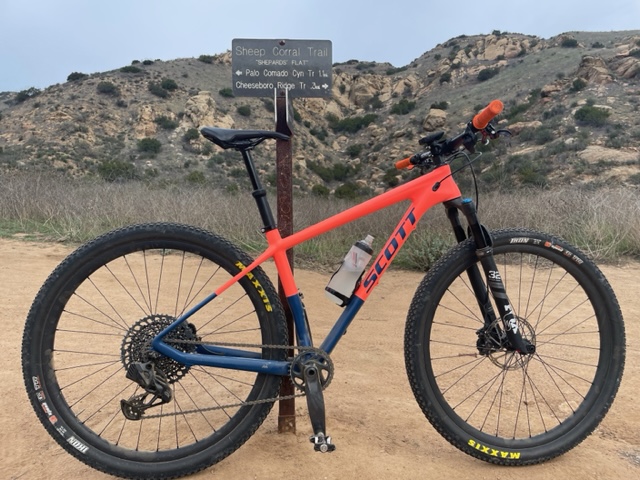
Step 13: Show off your bike
Here is a photo of mine. This frame is 13 years old, and it looks brand new. I absolutely love it!!
Please share a photo of your newly painted bike!
John


Very nice post. I just stumbled upon your blog and wanted to say that I’ve really enjoyed browsing your blog posts. In any case I’ll be subscribing to your feed and I hope you write again soon!
Thank you very much! John