How to Inflate a Tubeless Bike Tire
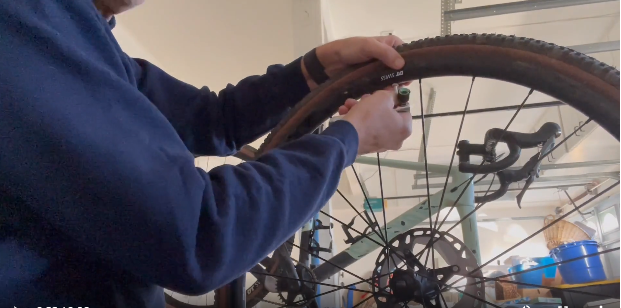
Here’s my hack on how to inflate a tubeless bike tire
Why tubeless tires are better for bike riding
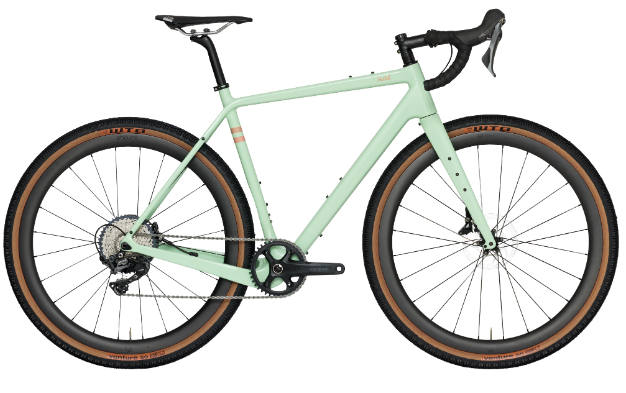
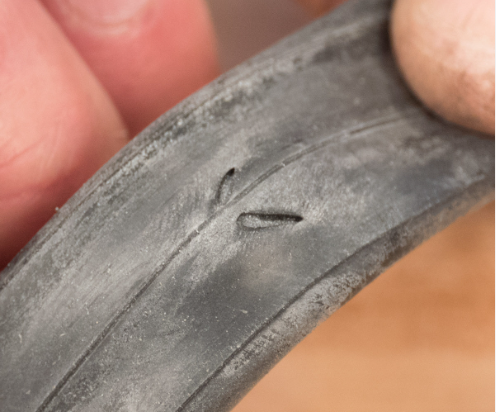
Here’s the deal. Tubeless bike tires are better for a number of reasons. The biggest difference is you can run lower air pressure in your tires because you don’t need to worry about pinch flats (where an innertube gets pinched between the bike tire and the rim when rolling over a bump or object). See the photo below.
Here’s my list of why tubeless tires are better
- You can ride faster. Recently, it has been discovered that running lower tire pressures is actually faster due to lower rolling resistance. Here is a video that proves it out from GCN.
- Your bike is more comfortable to ride because you can run lower tire pressure. I don’t know about you, but the roads are not getting any smoother these days. More comfort to me means more fun, riding longer, and overall good things.
- You seldom get flat tires. There are three types of flat tires. Pinch flats, previously referenced in this post, thorns and thin pieces of wire, and larger cuts. A tubeless setup will basically eliminate the first two types of flats. Cuts, by far the least common type of flat will require you to install an innertube to continue so it’s basically a wash.
- Tubeless tires are lighter. Yep, that’s right, eliminating the innertube makes a tubeless tire setup lighter. I’m guessing this will be a very small weight difference, but hey everything helps when you’re climbing that hill.
- Your bike will grip the road better. Running a lower air pressure increases your contact patch (the intersection between your bike tire and the road), and will roll over bump more smoothly. The net effect for you will be higher corning speeds and shorter stopping speeds.
You can a full rundown by reading my previous post Why you Should Ride your Bike with Tubeless Tires or watching my video below.
Why some people don’t like tubeless bike tires
Tubeless bike tires have some inherent problems that can make them difficult to use for some riders. One issue is the difficulty of sealing the tire to the rim, which can result in air leaks. Another issue is the potential for burping, which occurs when the tire loses air pressure from the sidewall of the tire and results in a loss of traction.
Additionally, some riders have reported a tendency for tubeless tires to puncture more easily compared to traditional clincher tires with inner tubes. Lastly, tubeless tires can be more challenging to install and repair compared to traditional clincher tires and may require specialized tools and knowledge. These problems can lead to frustration and decreased confidence in the reliability of tubeless tires, causing some riders to opt for more traditional tire setups.
Tubeless tire basics
Tubeless tires are really pretty basic and straightforward to work with. All you need are proper tools and a little know-how.
What you will need for a tubeless bike tire setup
Tubeless bike tire rims.
It is super important to have tubeless bike tire rims. Do not try to use non-tubless rims! This could cause a safety hazard and get you hurt. Check the side or your rims for any notations or Google your rim’s model number to confirm.
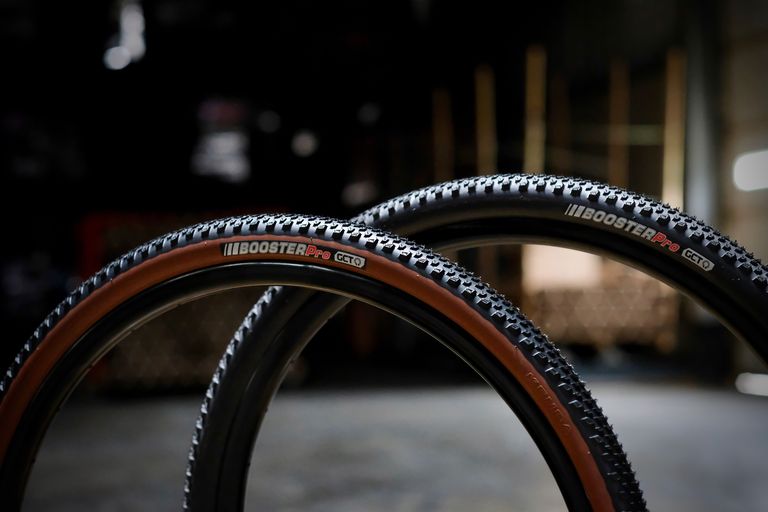
Tubeless bike tires.
Just like rims, do not attempt to run non-tubless tires tubeless. You could get hurt! Check the side of your time or Google your tire model number to check tubeless compatibility.
Other Stuff you’ll need for your tubeless bike tire setup
Tubeless rim tape
You want tubeless rim tape to seal the interior of your tubeless rims. There are many options for tubeless rim tape. It would be hard to go wrong. My go-to on this type of stuff is Competitive Cyclist.
Tubeless Valves
A tubeless setup will require you to purchase tubeless valves. Again., lots of options, and it’s hard to make a bad choice. The only trick thing here is to make sure you get a valve that is the appropriate size for your rims. Again my go-to on this type of stuff is Competitive Cyclist.
Sealant
This is the magic compound that seals your tire after it’s been punctured. There are lots of brands and I’m not sure which one is best. At some point in the future, I’ll perform a test between brands and post about it. Anyway, I’m going to assume Competitive Cyclist has vetted the sealants they offer.
A way to pump your tubeless tires up
Here’s where it gets tricky. The best way to pump up tubeless tires is with an air compressor. That’s all well and good, but a lot of us including me don’t want to have an air compressor laying around collecting dust and taking up space most of the time. Just so you know, you can get an air compressor at Lowe’s pretty cheap.
Most experts including the video below recommend using a floor pump to inflate your tubeless tires. The problem here is, you need to blast a lot of air in order to get your tire to seat properly. That means superhuman pumping action that may or may not work after multiple efforts.
Now that I have the basics covered, below you’ll find a video from GCN Tech that is a great tutorial on tubeless tire setup.
If you don’t want to buy an air compressor and don’t have a superhuman floor-pumping game, you might want to consider using a CO2 cartridge. It turns out, a CO2 cartridge is a perfect tool for the job because CO2 cartridges are designed to deliver lots of air (carbon dioxide in this case) really fast. The good news is that you probably already have C02 cartridges. If you are new to using C20, here are a few things. You want 20-gram threaded cartridges and an inflator. Best to buy both together as a set if you’re new to this. Amazon has great options.
Below is a video on my handy dandy hack.
That’s all I got about tubeless tires for today. Leave a comment if you have any additional hacks we should know about.
John
FAQ’s
How do you inflate a tubeless tire?
Inflating a tubeless tire involves creating an airtight seal between the tire and the rim so the tire can be filled with air and maintain its pressure without the need for an inner tube. Here’s a step-by-step guide on how to inflate a tubeless tire:
- Inspect the Rim and Tire: Before you start, make sure your rim is designed for tubeless tires. The tire bead and rim shape must be compatible for a proper seal. Also, inspect the tire for any damage or debris.
- Install the Valve Stem:
- First, remove any pre-existing rim strip or tape that’s not meant for tubeless setups.
- Install a tubeless valve stem through the valve hole in the rim. Tighten the nut on the outside, but don’t overtighten.
- Apply Tubeless Tape (if not already applied):
- Clean the rim bed with alcohol or a similar solvent to ensure it’s free of dirt or grease.
- Starting opposite the valve hole, wrap tubeless tape around the rim, ensuring it covers the spoke holes entirely. Overlap the tape at the valve hole and cut it neatly.
- Press down firmly on the tape as you apply it, making sure it’s well-adhered without any bubbles.
- Mount One Side of the Tire:
- Starting at a point opposite the valve, push one bead of the tire onto the rim.
- Work your way around until that side of the tire is entirely on the rim.
- Add Sealant (optional, but recommended):
- Tubeless sealant helps seal any small air gaps and can automatically seal small punctures while riding.
- Pour the recommended amount of sealant into the tire. The amount needed can vary based on tire size and manufacturer recommendations.
- Rotate the wheel to ensure the sealant is spread inside.
- Mount the Other Side of the Tire:
- Like before, start opposite the valve and work the tire bead onto the rim. This can sometimes be a bit tricky and might require tire levers, but be careful not to pinch the tire or damage the rim.
- Inflate the Tire:
- Using a high-volume floor pump or a compressor, begin inflating the tire. You should hear a series of pops or clicks as the tire bead seats onto the rim.
- If you’re struggling to get the tire to inflate, try removing the valve core for more airflow, use a tubeless inflator, or employ a compressor.
- Once the tire is inflated, give the wheel a good spin and shake to distribute the sealant inside.
- Check the Seating:
- Inspect the tire around the rim to ensure it’s seated correctly. The tire should be even all the way around, with no bulges or dips.
- Set the Desired Pressure:
- Once seated, inflate the tire to your desired pressure as per riding requirements.
- Test for Leaks:
- A simple method is to submerge the tire in water or spray it with soapy water. If you see bubbles forming, there’s a leak. Keep rotating and shaking the tire to allow the sealant to plug these areas. If leaks persist, you might need to check the tape and valve stem or consult with a professional.
Remember that tubeless tires can lose air more quickly than tubed ones. Regularly check your tire pressure and top off as needed
Do tubeless tires need a special pump?
No, tubeless tires don’t strictly require a special pump for inflation. However, seating the bead of a tubeless tire onto the rim can sometimes be challenging with a standard floor pump due to the volume of air needed in a short time to push the tire bead into the rim’s hook or channel.
To address this challenge, there are pumps and devices specifically designed to make the initial inflation of tubeless tires easier:
- Tubeless-specific floor pumps: These pumps often come with a secondary chamber that can be charged up with air. Once charged, you can release a large volume of air all at once, effectively seating the bead of the tire. These are often called “booster” pumps or something similar.
- Compressors: Many people use air compressors for seating tubeless tires. They deliver a rapid burst of air that can help the tire bead seat properly. If you use a compressor, make sure not to exceed the recommended tire pressure, and it’s helpful to use an attachment with a gauge to monitor this.
- CO2 inflators: In a pinch, especially while on the trail or road, you can use a CO2 cartridge with an inflator to give a rapid burst of air. However, there are two things to be cautious about: first, the sudden rush of CO2 can cause some latex-based sealants to coagulate, and second, it’s easy to overinflate and potentially damage the tire or rim with CO2 if you’re not careful.
- Canned air or booster canisters: Some products are essentially pre-filled canisters that can release a rapid burst of air, helping to seat tubeless tires. They’re a portable and convenient alternative to carrying a larger pump or compressor.
- Standard floor pumps: While they might not deliver air as rapidly as the options above, many people successfully seat tubeless tires using just a standard floor pump. Removing the valve core to allow more air to flow quickly can sometimes help, though it’s not always necessary.
After the initial seating, maintaining pressure or adding a bit of air to tubeless tires can be done with any regular bike pump.
Can you pump up tubeless bike tires?
Yes, you can pump up tubeless bike tires. Once a tubeless tire is set up and the bead is seated correctly on the rim, you can inflate it just like you would with a conventional tire with an inner tube. Here’s a brief rundown:
- Regular Maintenance: For routine top-ups and checking pressure, you can use a regular bicycle pump (either a hand pump or floor pump) to inflate your tubeless bike tires.
- Initial Seating: The challenging part for many tubeless setups is the initial seating of the tire bead onto the rim, as this often requires a rapid influx of air. While some can achieve this with a standard floor pump, others might find it easier using a tubeless-specific floor pump, a compressor, or a CO2 cartridge.
- Checking Pressure: As with any tire, it’s essential to regularly check the pressure in tubeless tires. Even when perfectly set up, tubeless tires might lose air slightly faster than tubed ones. Use a pump with a pressure gauge or a standalone gauge to ensure you’re within the recommended pressure range for your tires and riding conditions.
- Puncture or Air Loss on the Road/Trail: If you lose air from a puncture or from “burping” (where the tire momentarily unseats from the rim), you can use a mini pump or CO2 inflator to get rolling again.
Always keep in mind the manufacturer’s recommended pressure for your specific tire and rim combination. Riding tubeless offers the advantage of running lower pressures for better traction and comfort, but you still want to ensure you’re within safe limits.
Why won’t my tubeless tire inflate?
If your tubeless tire isn’t inflating, there could be several reasons. Addressing these common issues can help you achieve a successful inflation:
- Tire Bead Not Seated: One of the main challenges with a tubeless setup is getting the tire bead to seat against the rim properly. Sometimes, it’s helpful to push and manipulate the tire closer to the rim edge to minimize the gap.
- Insufficient Air Flow: Regular floor pumps may not deliver air fast enough to seat a tubeless tire. A compressor, CO2 cartridge, or tubeless-specific floor pump with a charge feature can help by delivering a rapid burst of air.
- Valve Issues:
- Valve Core: The valve core might be obstructed or not fully open, reducing airflow. You can remove the valve core for faster inflation and then replace it once the tire starts to take shape.
- Valve Seating: Ensure the tubeless valve is seated correctly and tightly against the rim. Sometimes, air can leak around the base of the valve.
- Rim Tape: If the rim tape isn’t applied correctly, air can escape through spoke holes. Ensure the tape covers all holes, is smooth without air bubbles, and extends edge-to-edge inside the rim bed.
- Sealant Obstruction: Old sealant, if left in the tire or rim from previous setups, can dry up and cause blockages. Ensure both the tire and rim are clean and free from dried sealant or debris.
- Tire or Rim Damage: Inspect both the tire and rim for damage. Even a small nick or dent in the rim can prevent an airtight seal.
- Lubrication: Applying a soapy water solution or specific tire mounting fluid around the bead of the tire can help the tire slide into place and create a seal more easily.
- Tire and Rim Compatibility: Not all rims and tires are compatible. Ensure that both your tire and rim are designed for tubeless setups and are compatible with each other.
- Starting with a Tube: If all else fails, you can try inflating the tire with an inner tube first to get the bead seated. Once it’s seated on both sides, you can carefully remove one side, take out the tube, add sealant, and then try inflating again.
- External Help: Sometimes, it’s beneficial to use straps or ratchets to compress the tire onto the rim. This can help in reducing the initial gap and aiding in inflation.
If you’ve tried addressing these issues and still can’t get your tire to inflate, it might be time to visit a local bike shop for assistance.
How to inflate a tubeless bike tire?
Inflating a tubeless bike tire is similar to inflating a regular bike tire, but the main challenge lies in the initial seating of the tire bead onto the rim. Here’s a step-by-step guide to inflate a tubeless bike tire:
- Ensure Compatibility: Make sure both your rim and tire are compatible for tubeless setups.
- Install Tubeless Valve: Insert the tubeless valve through the valve hole on the rim. Tighten the lockring/nut on the outside to secure it, but don’t overtighten.
- Mount the Tire:
- Start by mounting one side of the tire onto the rim.
- Add the tubeless sealant to the inside of the unmounted side. The amount will depend on the tire size and manufacturer’s recommendation.
- Finish mounting the second side of the tire onto the rim.
- Prepare for Inflation:
- Make sure the tire bead is as close to the rim as possible all the way around.
- Applying a soapy water solution around the tire bead can help with the sealing process.
- Inflate:
- Connect your pump or inflator to the valve. A tubeless-specific pump, compressor, or CO2 cartridge can provide the rapid air influx required to seat the tire bead.
- Start pumping quickly. You should hear popping sounds as the tire bead snaps into the rim’s seating. If you’re using a standard floor pump and the tire doesn’t seat, you might need a faster burst of air. Removing the valve core for a larger airflow can sometimes help.
- Inspect the Bead: Once inflated, inspect the tire’s bead to ensure it’s evenly seated around the entire rim. You might see a small line or ridge on the tire sidewall that indicates it’s seated correctly.
- Adjust to Desired Pressure: Inflate the tire to the desired pressure according to your tire’s and rim’s specifications and intended use.
- Check for Leaks:
- Rotate and shake the wheel a bit to distribute the sealant inside, which can help plug any minor leaks.
- To detect any leaks, you can spray soapy water around the tire bead, valve, and any other potential leak points. If you see bubbles forming, you’ve found a leak. Continue to shake and rotate the tire to let the sealant do its job. If persistent leaks remain, you might need to revisit the tubeless tape, valve installation, or check for tire/rim damage.
Remember, once the tubeless tire is set up and seated properly, regular inflation is as straightforward as with a conventional tire. You’ll just use a pump to top off the pressure as needed.
How to get tubeless tires to seal?
Sealing tubeless tires properly is crucial for their optimal performance and to prevent unwanted flats. Here’s a step-by-step guide to help ensure your tubeless tires seal correctly:
- Rim Preparation:
- Clean the Rim: Before starting, ensure that the rim is clean. Remove any old tape, sealant residues, or debris.
- Apply Tubeless Tape: Use a quality tubeless tape specific to the width of your rim. Begin a couple of inches before the valve hole and wrap the tape around the rim, stretching it slightly as you go. Overlap at least one full revolution around the valve hole to ensure a proper seal. Press the tape firmly into the rim bed.
- Insert the Tubeless Valve:
- Make a small hole in the tape over the valve hole using a sharp point.
- Insert the tubeless valve and secure it with the provided lockring or nut. Make sure it’s snug but don’t overtighten.
- Mounting the Tire:
- Install one bead of the tire onto the rim.
- Add the recommended amount of tubeless sealant.
- Mount the other bead onto the rim. Using a lubricant (soapy water or tire mounting fluid) on the bead can help it slide and seal better.
- Inflate the Tire:
- Use a high-volume pump, CO2 cartridge, or compressor to inflate the tire rapidly. This quick influx of air helps pop the tire beads into the rim’s bead seat. Removing the valve core during this step can also help by allowing more air in faster.
- Ensure Bead is Seated:
- As the tire inflates, you should hear a series of pops or snaps, which are the beads seating against the rim.
- Check the bead line (usually a small line or ridge on the tire’s sidewall) to ensure it’s consistently seated around the rim.
- Distribute the Sealant:
- Once the tire is inflated, shake and rotate the wheel to help distribute the sealant inside.
- Lay the wheel horizontally and give the sealant time to coat the inside of the tire and seal any small gaps or imperfections.
- Check for Leaks:
- Apply soapy water around the tire bead, valve, and tire itself. Bubbles will indicate air leaks.
- Continue to rotate and shake the wheel to ensure the sealant reaches and seals any leaks.
- Monitor Air Pressure:
- Leave the tire inflated overnight and check the pressure the next day. A slight drop is normal, but a significant loss indicates there’s a sealing issue that needs addressing.
- Additional Tips:
- If the tire doesn’t seal initially, reapply soapy water or mounting fluid and reinflate.
- Some stubborn tires may require seating with an inner tube first. Once seated, remove one bead, extract the tube, add sealant, and try seating again.
Remember, tubeless setups can vary based on the specific tire and rim combination. Some pairings are easier to seal than others. If you’ve tried multiple times and can’t get a tire to seal, consulting a local bike shop or fellow riders can offer additional insights or techniques specific to your setup.